Overview
BullCharts has access to the Data Email Manager, where you can have price updates emailed to you on a regular basis, for any or all of the securities you can chart in BullCharts. You can choose securities in a variety of pre-defined groups, add securities individually, or a combination of the two. The information can be sent in many different data formats, including formats compatible with Microsoft Excel.
The information will be emailed to the address you used when you first purchased BullCharts.
How it works
- In the Data Email Manager, you can set up Email Lists and WatchLists. Each list contains a collection of securities and an update frequency (for example, daily).
- Every so often (according to the update frequency you have chosen), the BullCharts servers will gather together all the information you have requested on all the securities in the list, and send that information to you in an email.
- If you want BullCharts to email you different sets of securities at different times, you can add a second list with a different frequency.
- If you missed an email (because your mailbox was full, or you accidentally deleted it, etc) you can request that the email data for a particular day be resent.
Email Lists versus WatchLists
What’s the difference between an Email List and a WatchList?
- Both WatchLists and Email Lists can contain individual securities.
- A WatchList is shared with the Portfolio System, and must be edited there.
- An Email List can contain groups of symbols. For example, if you add the “Consumer Staples” group to your email list, you will always receive information on all the ASX codes in that industry, even if new companies have listed or old ones de-listed since you configured your email updates.
Email System Basics
Accessing the Email System
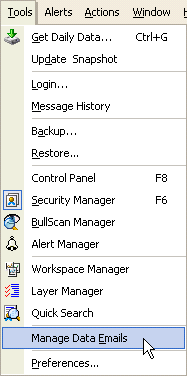
To access the email system, you need to be connected to the Internet. Go to the Tools menu, then choose Manage Data Emails:
Data Email Manager
When you first open the email system, the Data Email Manager will be displayed:
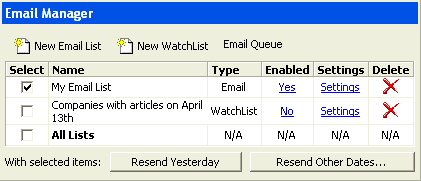
From the Data Email Manager, you can create new Email Lists and WatchLists, enable and disable lists, delete lists, edit the settings for lists, and resend copies of previous days’ emails. If you have resent some emails, you can check the outgoing email queue to see when your mails have been sent.
To create a new Email List, click the “New Email List” button.
To create a new WatchList, click the “New WatchList” button.
To examine your outgoing email queue, click the “Email Queue” button.
To disable an enabled list so that you will no longer receive updates (without losing your settings), click the “Yes” link in the Enabled column. When the page refreshes, the “Yes” should be a “No”.
To enable a disabled list so that you will receive updates again, click the “No” link in the Enabled column. When the page refreshes, the “No” should be a “Yes”.
To delete a list entirely, click the red cross in the Delete column.
To change the settings for a list, click on the “Settings” link.
To resend the update email for a particular set of lists, make sure the lists you want have a tick in the first column, and the lists you don’t want are not ticked, then click the “Resend Yesterday” or “Resend Other…” buttons.
Email Settings
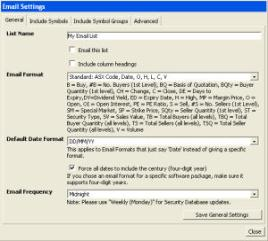
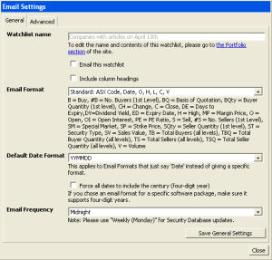
The Email Settings page allows you to configure various settings for an email list. The Settings page for an Email List contains four tabs: General, Include Symbols, Include Symbol Groups, and Advanced. Since a Watch List is edited in the Portfolio section, the Settings page for a Watch List only contains the General and Advanced tabs

|

|
||
| Email List settings | Watch List settings |
General Tab
The General tab contains the most important settings for an Email List or Watch List.
Name enables you to edit the name of an Email List, or view the name of a Watch List. To edit the name of a Watch List, click on the link to go to the Portfolio section.
Email this (watch) list reflects the “Enabled” column in the Data Email Manager. That is, if you tick “Email this list”, the list will be enabled in the Data Email Manager. If you untick “Email this list”, the list will be disabled in the Data Email Manager. If the list is disabled, its settings are remembered, but no emails will be sent.
Include column headings, if enabled, places a short description of each column at the top of the data. Column headings make it easy to distinguish between columns that contain very similar data (such as Open, High, Low, and Close), but if you are using the data from the update emails in another piece of software, that software might expect data without column headings.
Email Format lets you choose what information will be included about each security in the list. Some formats are named after a piece of software they are designed to be compatible with, while others have names containing an abbreviated description of their contents. Below the Email Format list is a key that describes what each of the abbreviations means.
Date Format lets you choose a date format for those email formats that do not include a fixed date format. Email formats named after particular software packages, or formats whose name includes an explicit date format such as YYYYMMDD or DD/MM/YY will ignore this setting, but email formats which include a column named ‘Date’ will respect it
In this list, “DD” means a numeric day of the month, “MM” means a numeric month, “YY” means the last two digits of the year, “YYYY” means all four digits of the year, and “MON” means a three-letter abbreviation for the month (such as Jan, Feb, Mar, etc.)
Force all dates to include the century, if enabled, amends the Date Format setting. If the Date Format setting includes a four-digit year (YYYY), this setting does nothing. If the Date Format setting includes a two-digit year (YY), enabling this setting makes the Date Format setting act as though it included a four-digit year.
Email Frequency lets you choose how frequently updates for the securities in this list are emailed to you.
Save General Settings applies the settings you’ve made to the current list. If you leave this page (by clicking on another tab, for example) without clicking “Save General Settings”, your changes will be lost.
Close takes you back to the Data Email Manager, without saving any changes you might have made.
Include Symbols Tab
This tab is only available for Email Lists. To edit the symbols in a Watch List, go to the General tab and click on the link to the Portfolio system.
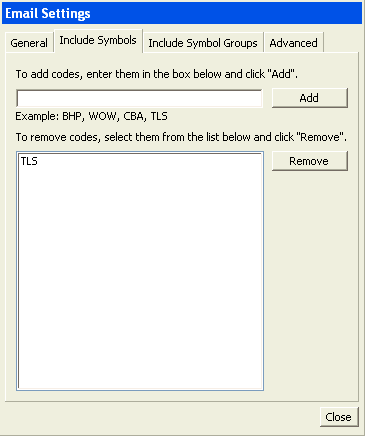
To add codes to the Email List, type them into the Add box, then click “Add”. If you want to add many symbols at once, you can type them all into the Add box, separated with spaces or commas, like this:

To remove codes from the Email List, select them in the Remove box, then click “Remove”. If you want to remove many symbols at once, you can choose more than one by holding down the CTRL key as you click on each one:
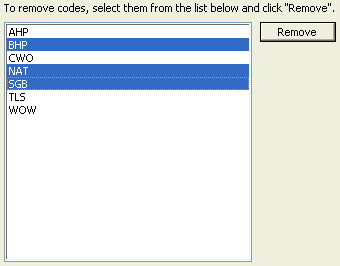
Changes made in this tab take effect as soon as you click “Add” or “Remove”. You don’t have to explicitly save them.
The Close button takes you back to the Data Email Manager.
Include Symbol Groups Tab
This tab is only available for Email Lists. WatchLists cannot contain symbol groups.
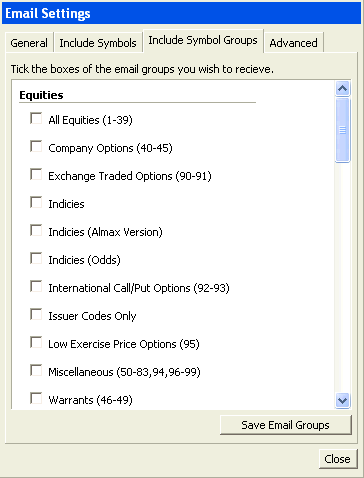
To include symbol groups into your Email List, tick the boxes next to the various groups of securities you wish to receive, then click “Save Email Groups” to save your changes.
When you add a symbol group to an email list, each email you receive will contain all the symbols in that group on the day the email was generated. That means that if you add the “Consumer Staples” group to your email list, and six months later a new security is added to the Consumer Staples group, your emails will automatically begin including information on the new security.
The Close button takes you back to the Data Email Manager.
Advanced Tab
The Advanced tab allows you to configure some of the finer details of how your email list is formatted and sent.
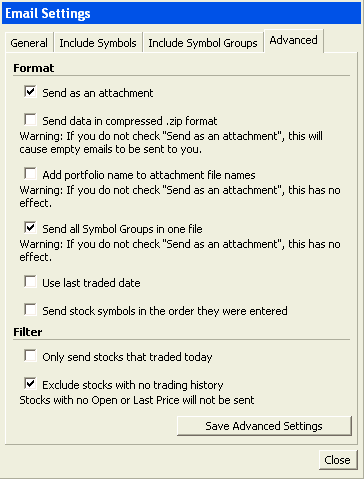
Send as an attachment causes every group (in an email list) and the manually added symbols to be sent as an attachment to the update email, instead of all being pasted into the main body. If you are sending many symbol groups, or archiving your update data, this might make it easier to maintain. If you are sending few groups or you want to use the data directly from the email, (say, copying it and pasting it directly into Excel), having to open the attachment might slow you down.
Send data in compressed .zip format causes every group and the manually added symbols to be sent in compressed .zip files. A .zip file is a special kind of file that can contain other files, and contains compression technology which makes them faster to download and use less space on your hard disk. To extract your data from the .zip file so that you can use it normally, you’ll need special software such as WinZip, PKZip, or the Zip Folders feature that comes with Microsoft Windows XP.
If you do not have “Send as an attachment” ticked, you will receive emails containing nothing at all.
Add portfolio name to attachment file names causes the attached data to have the name of the list added to the data attachments. For example, if you had a list named “My Watch List” and you were sent data on the 24th of June 2004, you would normally receive an email with an attachment called “20040624.txt”, but with this setting ticked, the attachment would be named “20040624_My Watch List.txt”
If you have many active lists sending you updates, or you archive your updates, this option can help you keep track of exactly which data is in each attachment. If you do not have many active lists, you do not archive your updates, or you do not receive updates as attachments, this option has no benefit.
If you do not have “Send as an attachment” ticked, this option has no effect.
Use last traded date causes the date for each security in the update to reflect the date the security was last traded, rather than the date the email was generated. This is helpful if you receive updates for securities that trade infrequently.
Send stock symbols in the order they were entered causes each update to list your requested securities in the order they were entered, rather than alphabetical order. If you have added securities to your list in special groups, or you want to be reminded of the order you added securities to the list, tick this setting.
Only send stocks that traded today filters out any securities that have not traded today, and whose data will therefore be identical to yesterday’s data. This is helpful if you receive updates for securities that trade infrequently.
Exclude stocks with no trading history filters out any stocks that traded for the first time today. Specifically, securities which do not have an Open price or a Last price will be removed.
Save Advanced Settings applies the settings you’ve made to the current list. If you leave this page (by clicking on another tab, for example) without clicking “Save Advanced Settings”, your changes will be lost.
Close takes you back to the Data Email Manager, without saving any changes you might have made.
Resending Email
If you do not receive one of your update emails, or an update email is lost for any reason, you can have it sent to you again. Go to the Data Email Manager, then make sure the lists you want to resend have a tick in the first column, and the lists you don’t want resent do not have a tick in the first column.
If you want to resend the update from the last trading day, click “Resend Yesterday”. Note: “Resend Yesterday” does not necessarily send yesterday’s data; if you click “Resend Yesterday” on a Monday, you’ll receive Friday’s data.
If you want to resend the update from any other day, click “Resend Other Dates…” which will allow you to select as many dates as you like from the list:
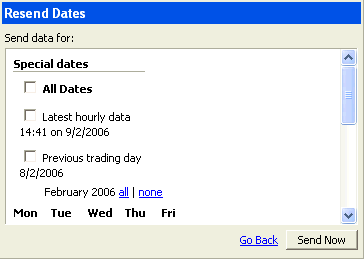
Place a tick next to the dates for which you wish updates to be resent, then click “Send Now”. Note: You can only resend data for dates in the last 30 days. If you need to resend older data, please contact BullSystems.
If you wish to go back to the Data Email Manager without sending anything, click “Go Back”.
After clicking on “Resend Yesterday” or “Resend Other Dates…”, you will be taken to the Email Queue.
Email Queue
The Email Queue contains a list of all update emails either recently sent to you, or being prepared.
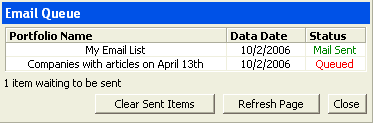
Each row represents a single email, and contains the name of the list whose securities are included in the update, the date of the data included in the update, and whether the mail has already been sent, or is waiting to be sent.
Clear Sent Items removes all the rows whose status is “Mail Sent” from the queue. Items that are not yet sent will not be cleared until they have been sent and you click “Clear Sent Items” again.
Refresh Page updates the status of any queued items that have been sent since the last time the page was refreshed. If you’re waiting for a large batch of updates to be sent, you can click “Refresh Page” every few minutes to keep up-to-date on the progress of your request.
Close takes you back to the Data Email Manager.