Overview
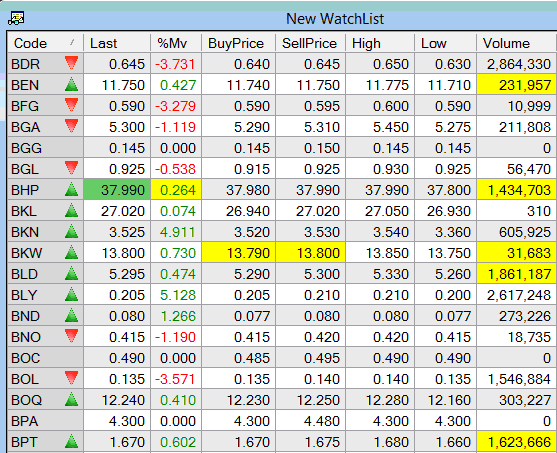
BullCharts contains a Detailed WatchList feature allowing you to quickly view all your security details at a glance in a tabular format. It will show you key information about all securities in one particular watchlist, with customisable columns to remove unwanted columns and include others, or rearrange the columns. For users with the live data feed it will show the very latest details, while for end-of-day data plan users it will show the latest end-of-day data.
How to display a Detailed WatchList
There are three ways to generate this Detailed WatchList:
Double click on the watchlist name.
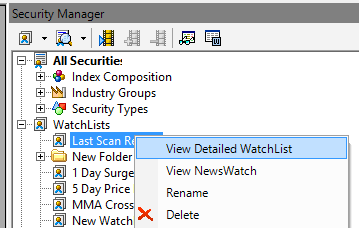
Alternatively, right-click on any watchlist and from the drop-down menu select: “View Detailed WatchList“; or
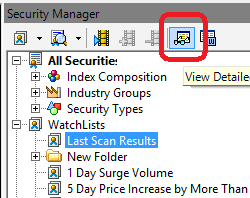
Select a WatchList, then click on the View Detailed WatchList icon.
Changing Schemes
Currently BullCharts has 2 schemes you can choose. To change the scheme:
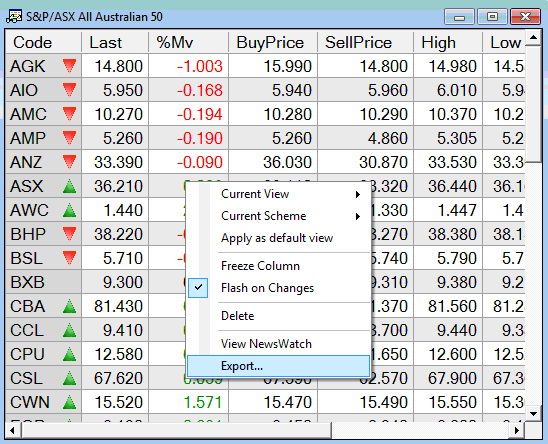
Option 1 Right-click on a Detailed WatchList table and select Current Scheme choose your preferred scheme.

Option 2 From the main toolbar select Format > Current Scheme then choose your preferred scheme.
Detailed WatchList View
Detailed WatchList view allows you to customise the columns displayed in the table so you can see the information you need at a glance. You can choose from over 30 different columns.
Edit the Detailed WatchList View
To edit the columns displayed in your Detailed WatchList
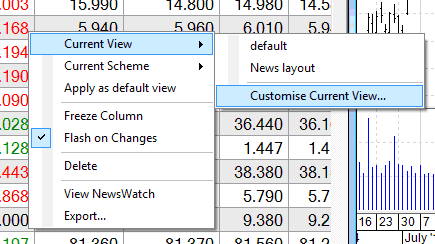
Option 1 Right-click within a Detailed WatchList table and then select Current View > Customise Current View…
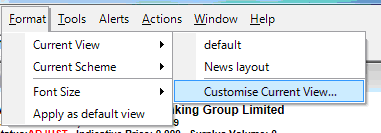
Option 2 From the main toolbar, select Format > Current View choose Customise Current View…
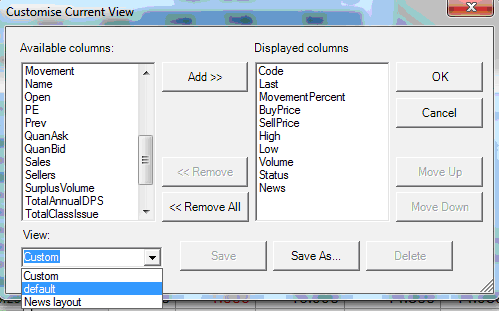
To create a new view
To add columns, select items from Available columns list, and then click the Add>> button.
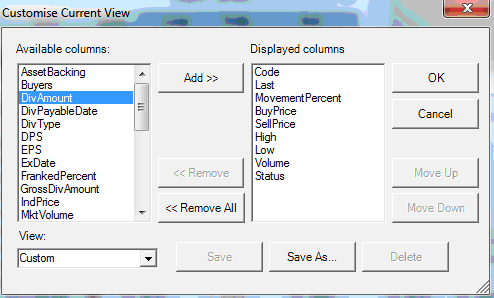
To remove columns, select items from Displayed columns, and then click the <<Remove button.
Once you finish customising the current view, you may save the settings to be used later by clicking Save As… then name the view and click OK.
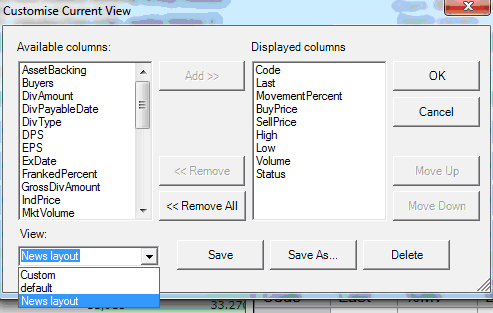
To modify an existing view
Select the view to modify from the View dropdown list. Modify columns as required and then click Save.
To modify the default view
To set up the default view, select Default in the View dropdown list and click Save.
Export a Detailed WatchList
To export your current Detailed WatchList table as a CSV file, right-click on a Detailed WatchList table then click Export…